

These are instructions on how to install the Google Pixel USB Driver on a Windows computer, which helps you connect your Google Pixel Devices to the computer.
Requirements: You need a Windows computer (32-bit or 64-bit) to install the Google Pixel Drivers.
Steps to Install Google Pixel USB Driver on Windows
- Download and extract the Google Pixel USB Driver on the Computer. If you have already downloaded the USB Driver, then SKIP this step.
- After extracting the Google Pixel USB Driver package, you will be able to see the following files:
- Now, Open the Setup (.msi) File:
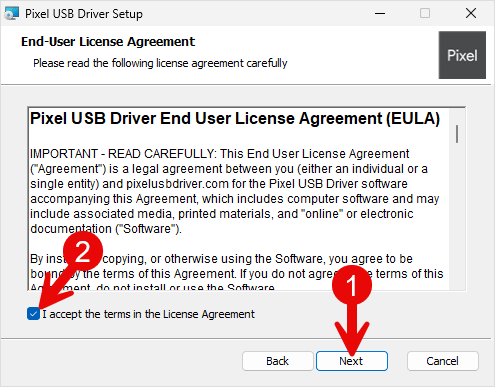
- Now, Click Next Button to Continue.
- Again, Click Next Button to Continue.
- Now, Choose the Installation Location (leave it as default) and Click Next Button.
- Now, Installation will be completed within a minute.
- Once Installation is Completed, Click Finish Button to Close the Setup.
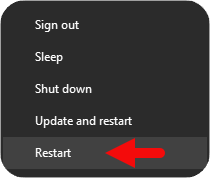
- Now, Restart your Computer. Once your computer is restarted, you can easily connect your Google Pixel phones and tablets to the Windows computer.




Notes:
[*] Download Google Pixel Driver: You can download the latest Google Pixel USB Driver from our Download Section.
[*] Google Pixel USB Driver for Specific Model: If you are looking for the Google Pixel USB Driver for a specific model, then head over to our Devices page.
[*] Google Pixel Firmware: If you are looking for the official Google Pixel Stock Firmware, then head over to the Google Pixel Firmware page.
[*] Remove or Uninstall: If you want to remove or uninstall Google Pixel USB Driver from the computer, then head over to How to Uninstall Google Pixel USB Driver page.
